

Should bring a tear to your eye because if your starter is healthy you definitely have a sour smell wafting from the container. My fellow BBB sister Lien called the smell at this stage, "strong glue smell"!
Two things you probably have going on in that container is little if any evidence of a rise or big bubbles. You also have hooch between every feeding and at the bottom, you may even have a thick gloopy flour mixture.

Don't worry about any of this. It is all part of our starter growing up. Just stir it all back in and together and go about your normal first
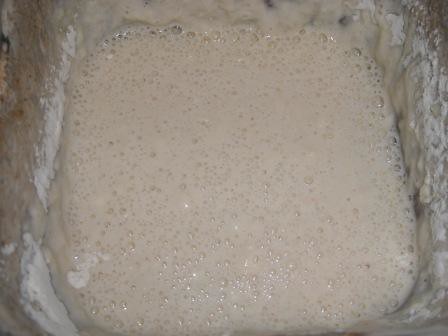
and second feedings.

Another part of any pre-teen is wanting to stretch their wings and try to fly. So, let's talk about what you can do with some of that toss off starting Saturday!
How to get a starter ready to bake with also called a power feed.
We need to give a starter a bit of a jump start to get it all bubbly and at peak rising capacity before we can bake with it. This is going to be especially important with our young starters. But we also need to test our starter to make sure we will have a viable starter for when we want to make a tasty boule
or baguette with it. This is called power feeding the starter. Just think of it as "carb loading" before a marathon. Depending on the recipe and when you want to bake, you will either do this 2 -4 hours before baking or right before going to bed.
Here is what you do:
Stir in any hooch back into the starter, DO NOT toss any off, you want the full Monty. Feed the 1/2 cup water and 1/2 cup AP flour. This will give you enough to starter to make something and still have starter left over to grow for the next time to bake. If you want to bake a double batch of something feed the starter 1 cup of water and 1 cup of flour. You will need to use this power fed starter within 12 hours of feed.
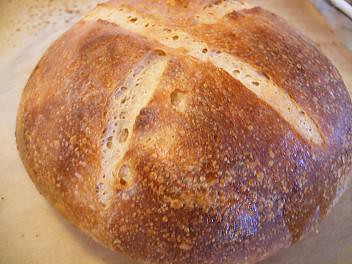
Now, what to bake? I like to have people make one or both of two really simple recipes that should result in fantastic food and definitely won't fail with a young starter: quick bread and Klondike Pancakes! Why something like this versus a boule or a loaf of bread? Because your young starter may or may not have enough Ompf to force a full rise and remember my motto about baking with yeast? Success breeds success. I would rather have you get comfy working with the starter AND have something yummy to eat than to end up with a flat, pale piece of baked dough.
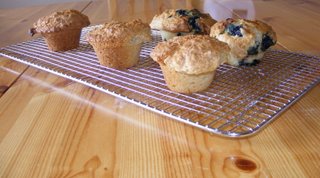
Sara of I Like to Cook's Blueberry Muffins from her young starter, "Crater Face". Crater Face is about two weeks old and was born from this starter recipe.
Quick Bread/Muffin Master Recipe.
You can add anything you want to this recipe and you will have muffins or a loaf of quick bread
Step 1: Power Feed for Starter about 2 - 4 hours before baking (or night before). See directions above for the Power Feed.
Step 2: Master Recipe
1 egg
1 tsp vanilla
1/4 cup vegetable oil
1 cup starter
1 cup AP flour
1 tsp baking soda
1/2 cup sugar (if making a savory muffin/bread, reduce sugar to 3 TBS but don't eliminate. You need this to give the starter a little boost!)
1/2 cup fruit, nuts or anything else you want to add
Pre-heat oven to 400 degrees. Prepare muffin tins or 8 x 4 loaf pan with light coating of cooking spray, even if using paper muffin cups.
Combine dry ingredients in small bowl. Stir in fruit, nuts or what ever you are going to add to the muffins/bread. Combine wet ingredients in medium bowl. Add dry ingredients to wet ones. Mix until all the ingredients are just combined
Bake for 15 - 20 minutes or until golden brown or 35 - 40 minutes for quick bread or until a tooth pick inserted comes out clean. If tops start to brown too fast, cover with a sheet of foil
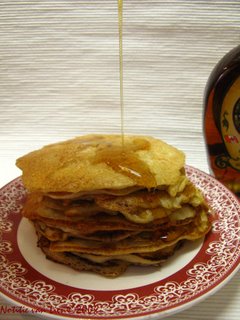
Lien of Notitie van Lien Klondike Pancakes made with her young starter, "Gollum". Gollum is about two weeks old and was born using this starter recipe!
Klondike Pancakes
Originating in a Alaska during the Gold Rush, this was popular in the late 1800s, when a sourdough starter was the common and reliable way to provide leavening for bread products.
Preparation begins the night before.
1 cup sourdough starter
1 cup all-purpose flour
1 cup warm water
1 large egg
1 tablespoon vegetable oil
1 tablespoon granulated sugar
1/2 teaspoon salt
1/2 teaspoon baking soda
Place the sourdough starter in a nonreactive mixing bowl, add the flour and water. Stir and leave, loosely covered, overnight in a warm place.
The following morning, stir the mixture and remove 1/2 cup, adding it to your sourdough starter in the refrigerator or on the counter (This is called "paying the kiddie).
To the prepped sourdough mixture, add remaining ingredients, stirring well. Wait 10 minutes for baking soda to activate. For each pancake, pour scant 1/4 cup batter onto a hot griddle. Cook pancakes until dry around edges and the bubbles formed on top have "popped". Turn and cook other sides until lightly golden brown.
Serve hot with butter and syrup (maple syrup or Lyle syrup)
Finally, if you want to try something really savory, go visit Tanna of My Kitchen in Half Cups and check out the onion rings she made with her starter.

Tanna hasn't shared her starter's name with us yet but it too was born from this recipe.
One last thing, speaking of names, tomorrow you can name your starter!!! Can't wait to read what you come up with for you little yeast beast on the counter...


